
In this article, I’ll show you how to create DHCP scopes, reservervations and more with WINRM and ANSIBLE.
Configure WINRM
We need to configure WINRM on our Microsoft Active Directory first to enable the connection from ANSIBLE. This assumes that you have created a CA server and a certificate for your active directory server has been created. Sure, you can choose to do straight HTTP connections but in a real world environment, you’ll need to use HTTPS.
The setup guide can be found here: https://docs.ansible.com/ansible/latest/os_guide/windows_setup.html
I’m using a windows 2016 server. Open a powershell command window. WINRM has a listener and a service, which both need to be configured first. We need to find the thumbprint of the certificate we are using with our ad server. You can find the thumbprint under MMC > certificates > Personal > Certificates
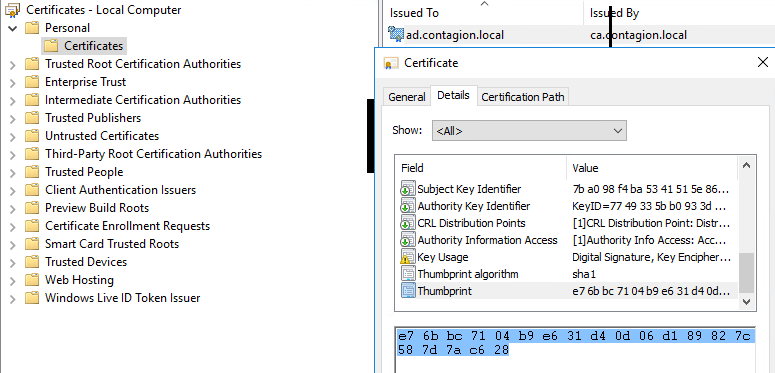
with the thumbprint, run this commands.

Now type in your username and password for the WINRM connection, this is your administrator/password creds.
$username = "Administrator"
$password = "YourPassword"
Now we can add the WINRM HTTPS configuration
winrm quickconfig --transport:https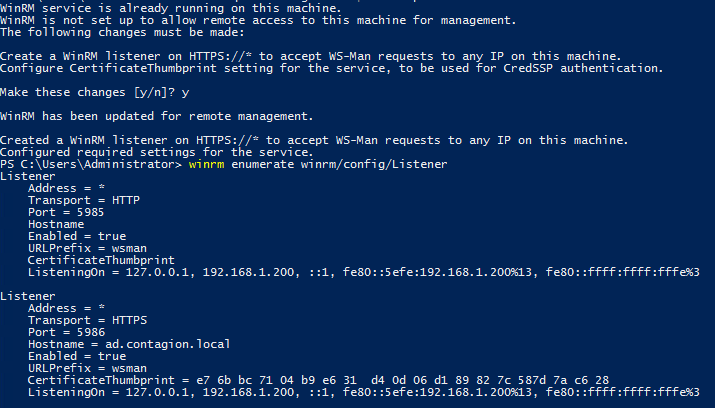
Something that is not really explained in the official notes is that you need to enable the auth certificate settings to let ansible connect to the WINRM service.
Run this command and look at the output
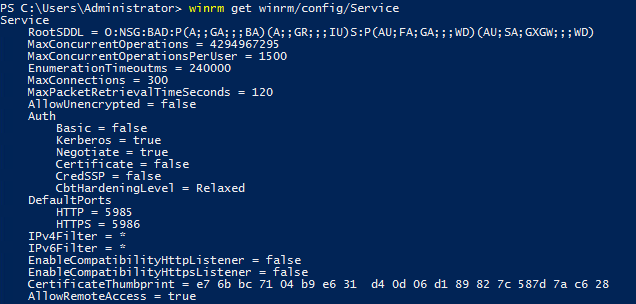
Certificate is set to false. Let’s enable it.
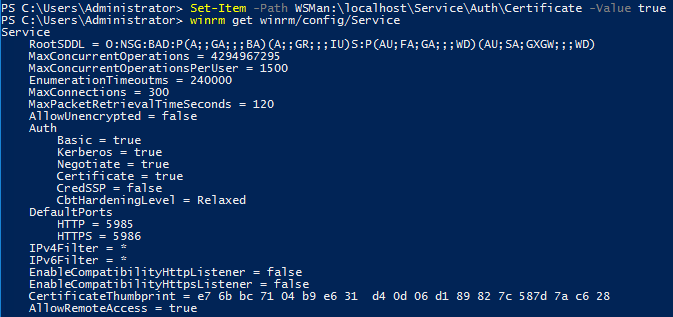
Under Auth > Certificate is not set to true.
From your machine that you will be running ansible from, mine is a ubuntu 22.04 machine, we’ll need to install a few things first.
Open your hosts file for your ansible playbook.
[adserver]
192.168.1.200

[adserver:vars]
ansible_user=Administrator
winrm_username=Administrator
ansible_password="YourPassword"
winrm_password="YourPassword"
ansible_port=5986
ansible_connection=winrm
ansible_winrm_scheme=https
ansible_winrm_server_cert_validation=ignore
ansible_winrm_kerberos_delegation=true
I would probably need to change the certificate validation to verify but I haven’t really figured this one out. 😛 sorry.
Now we’ll need to install pvwinrm to enable communication between ansible and the Windows Active Directory server.
pip3 install pywinrmThis may also install some dependencies.
Now let’s test out connection to the WINRM server.
ansible -i hosts adserver -m win_pingWhere “adserver” is the name of your host, referring to our host file. You will get this message:
192.168.1.200 | SUCCESS => {
    "changed": false,
    "ping": "pong"
}
Right! So let’s create a new scope our Microsoft Active Directory server.
Create a dhcp_scope.yml file and add this code in it.
- name: Create DHCP scope and options
  hosts: adserver
  gather_facts: no
  become: yes
  become_method: runas

  tasks:
    - name: Create DHCP scope
      win_shell: Add-DhcpServerv4Scope -Name "Lab-4 Network" -StartRange 10.10.10.1 -EndRange 10.10.10.254 -SubnetMask 255.255.255.0
      register: dhcp_scope_result
      vars:
        ansible_become_method: runas
        ansible_become_user: "{{ winrm_username }}"
        ansible_become_pass: "{{ winrm_password }}"
      ignore_errors: yes
Now run this playbook with your host file
ansible-playbook -i hosts dhcp_scope.yml
Success!
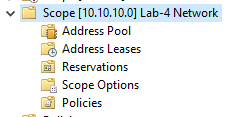
Now you can check the results on your microsoft active directory in your DHCP console:
There is plenty of options to configure your DHCP server with powershell, you can find all the information you need here: https://learn.microsoft.com/en-us/powershell/module/dhcpserver/?view=windowsserver2022-ps&viewFallbackFrom=win10-ps