
If you’ve ever found yourself staring at a loading spinner on your WooCommerce store and muttering “this shouldn’t take that long…”, then buckle up — because I’m about to show you how I turned my sluggish store into a speed demon using a combo of WordPress, WordOps, Redis, and Cloudflare.
The Stack: What I Use and Why
Let’s break it down:
- WordPress – The trusty CMS we all know and sometimes curse. Flexible, extendable, and capable of great things — if you treat it right.
- WooCommerce – For selling those sweet products. But let’s be honest: it’s a bit of a heavyweight.
- WordOps – My secret weapon. It’s like having a DevOps butler that sets up your server just the way you want.
- Redis – For those ultra-fast cache hits. Lightning in a bottle.
- Cloudflare – A global shield and CDN wizard that makes your site load from pretty much anywhere like magic.
Step 1: Deploying with WordOps (The Easy Way)
First things first, spin up your VPS (I’m using vpsdime.com, a cheap provider built on openvz containers with 4VCPUs and 6GB ram, for 7$ month), then install WordOps with:
wget -qO wo wops.cc && sudo bash woThen I go with the Redis stack for extra punch:
–wp installs wordpress
–wpredis installs and configures the redis server, an object caching server
–php83 installs php 8.3 with php-fpm
–letsencrypt create a certificate for your example.com site
wo site create example.com --wp --wpredis --php83 -letsencryptThis gets me:
- Fast Nginx config
- Redis object caching
- Let’s Encrypt SSL (auto-renewed!)
- A clean, fast WordPress install out of the box
Step 2: Tuning WordPress (No Bloat Allowed)
I nuke the default themes and plugins. I want speed, not fluff. Then I add:
- A good theme, i’m using Betheme
Then I add a few speed tweaks:
- Disable WordPress Heartbeat API
- Remove emoji scripts
- Set autosave interval to something reasonable (like 180 seconds)
- Limit post revisions
Optional but spicy:
phpCopyEditdefine( 'WP_POST_REVISIONS', 5 );
define( 'AUTOSAVE_INTERVAL', 180 );
⚡ Step 3: Nginx and Redis – Your New Best Friends
Thanks to WordOps, Redis is already installed and configured. Wordops adds the Redis Object Cache plugin and I just hit “Enable.”
Go to settings > Redis
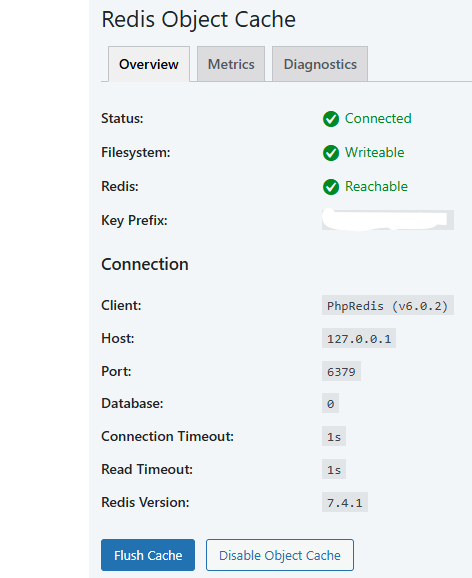
Now I’m caching database queries like a pro, and WooCommerce stops dragging its feet.
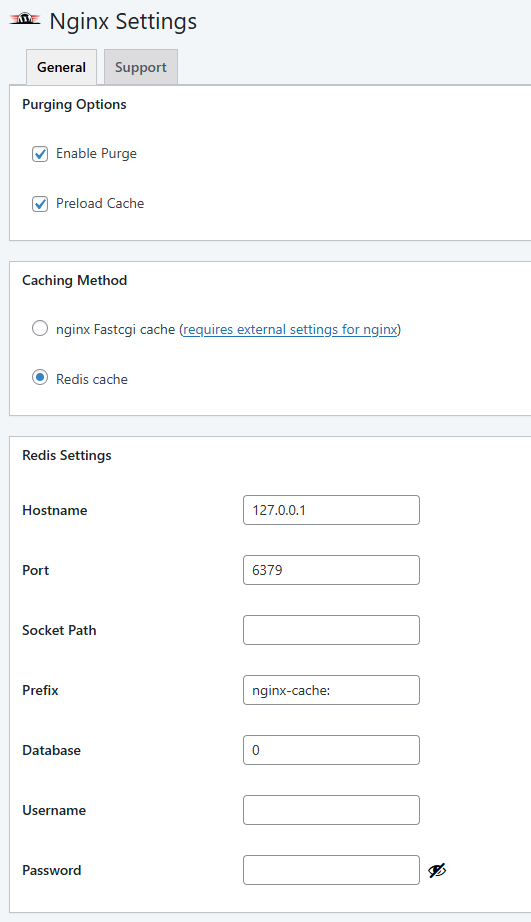
For NGINX, be sure it’s caching via Redis.
Go to Settings > Nginx helper
☁️ Step 4: Cloudflare – Speed & Security in One
I use the free plan on Cloudflare. First you need to create an account on Cloudflare.
When that’s done, you can add your domain. Follow the instructions, it’s pretty simple. You can also leave a comment below and I can help you when I’m online.
- SSL is set to Full (Strict)
- “Always Use HTTPS” is on
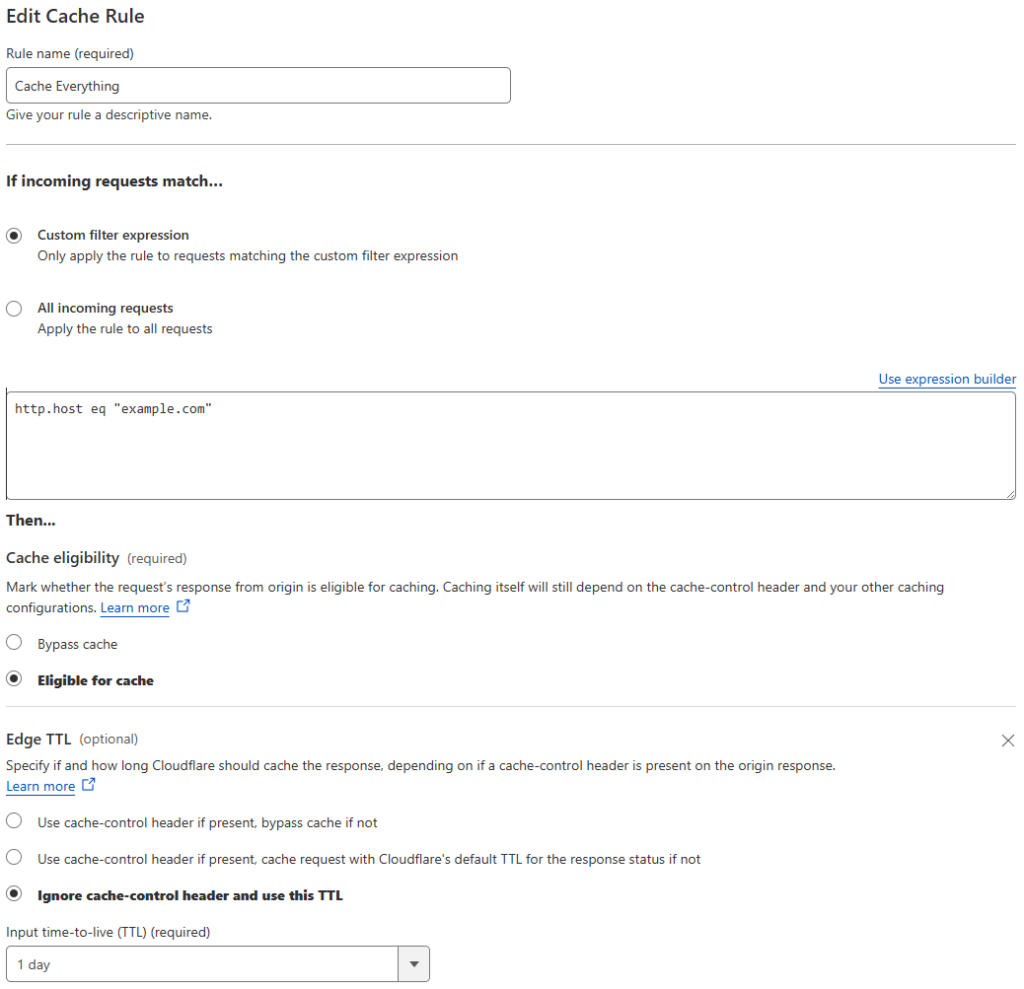
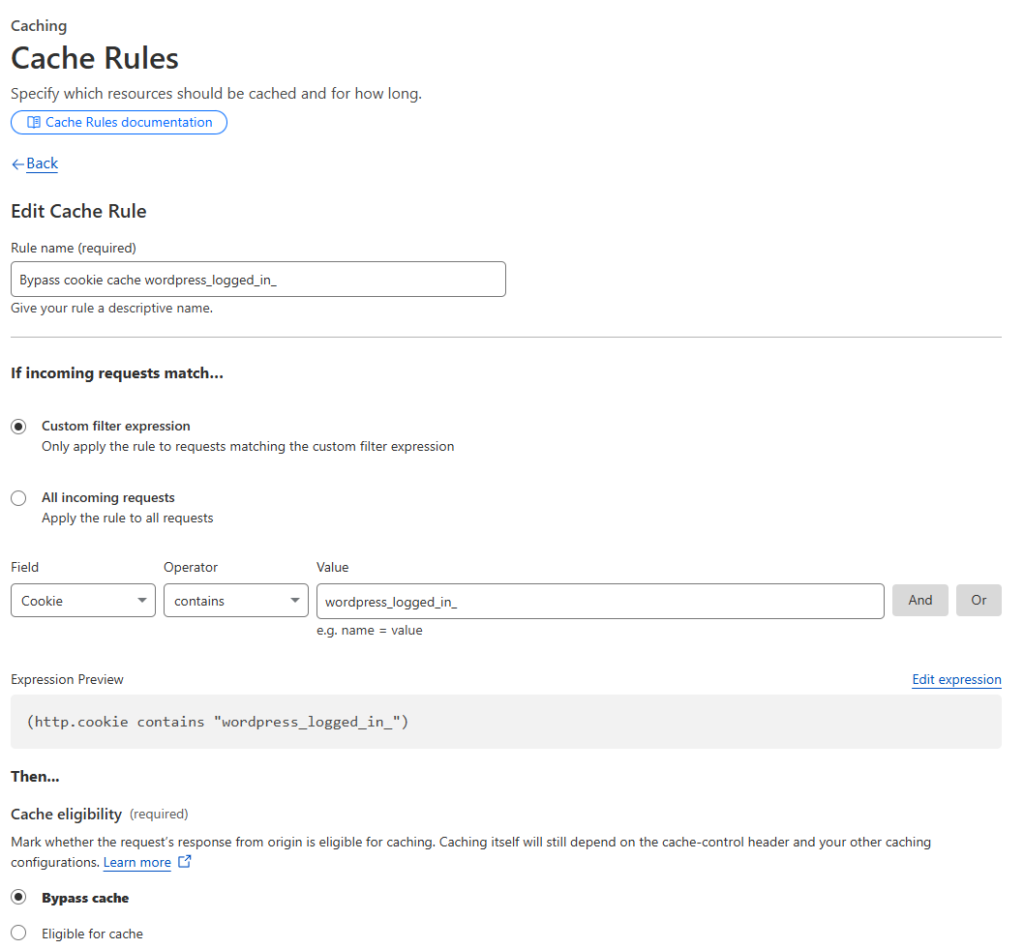
Last step is to enable some rules to make WordPress and Woocommerce behave
Create a new cache rule
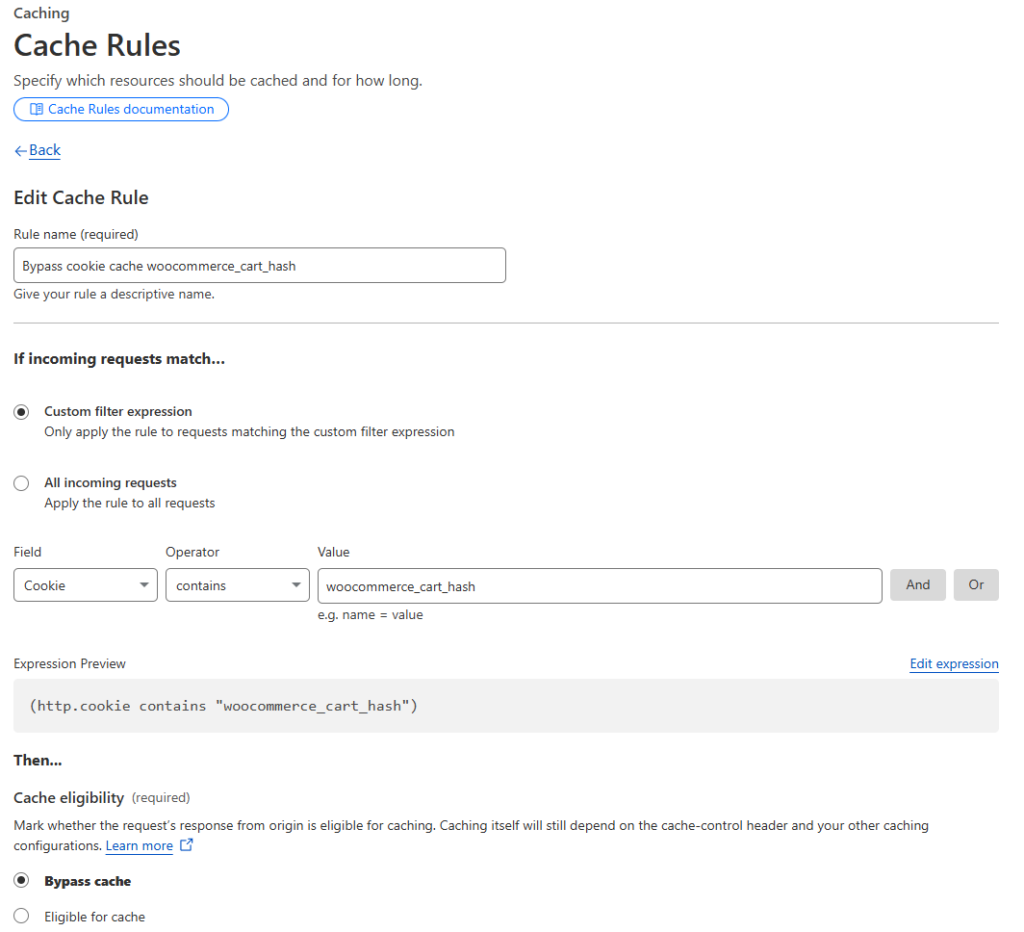
Create some bypass rules
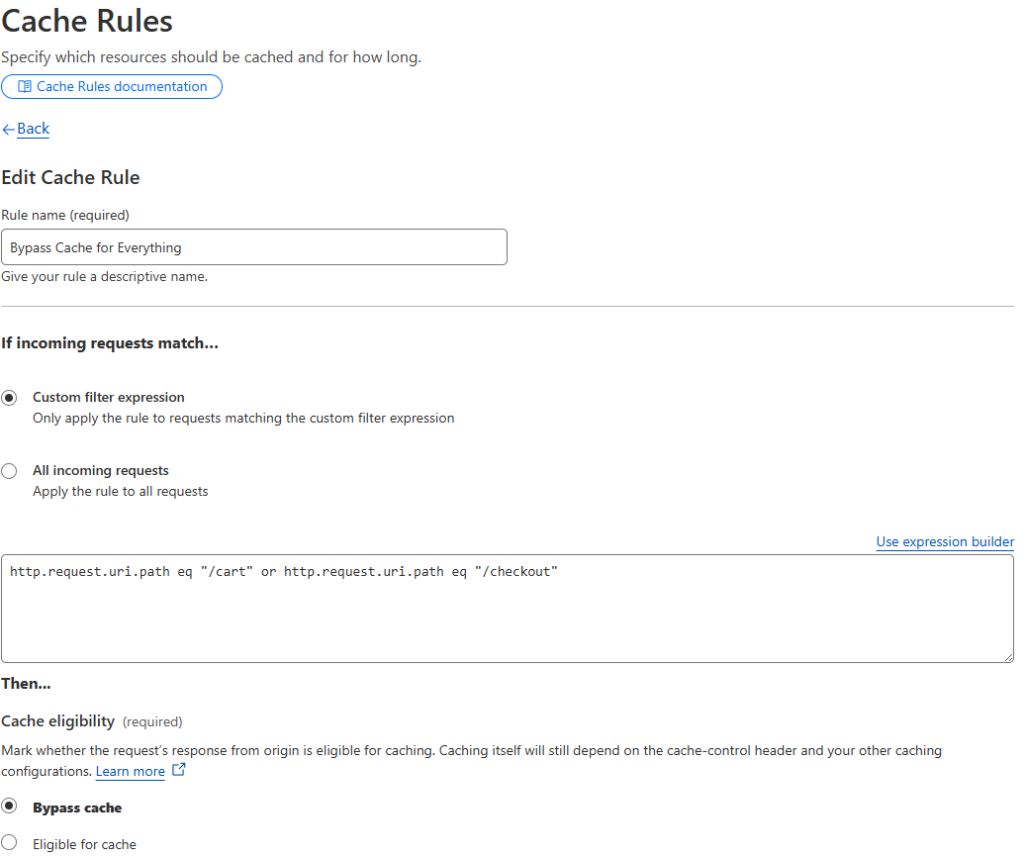
and more rules
and some more rules
and again
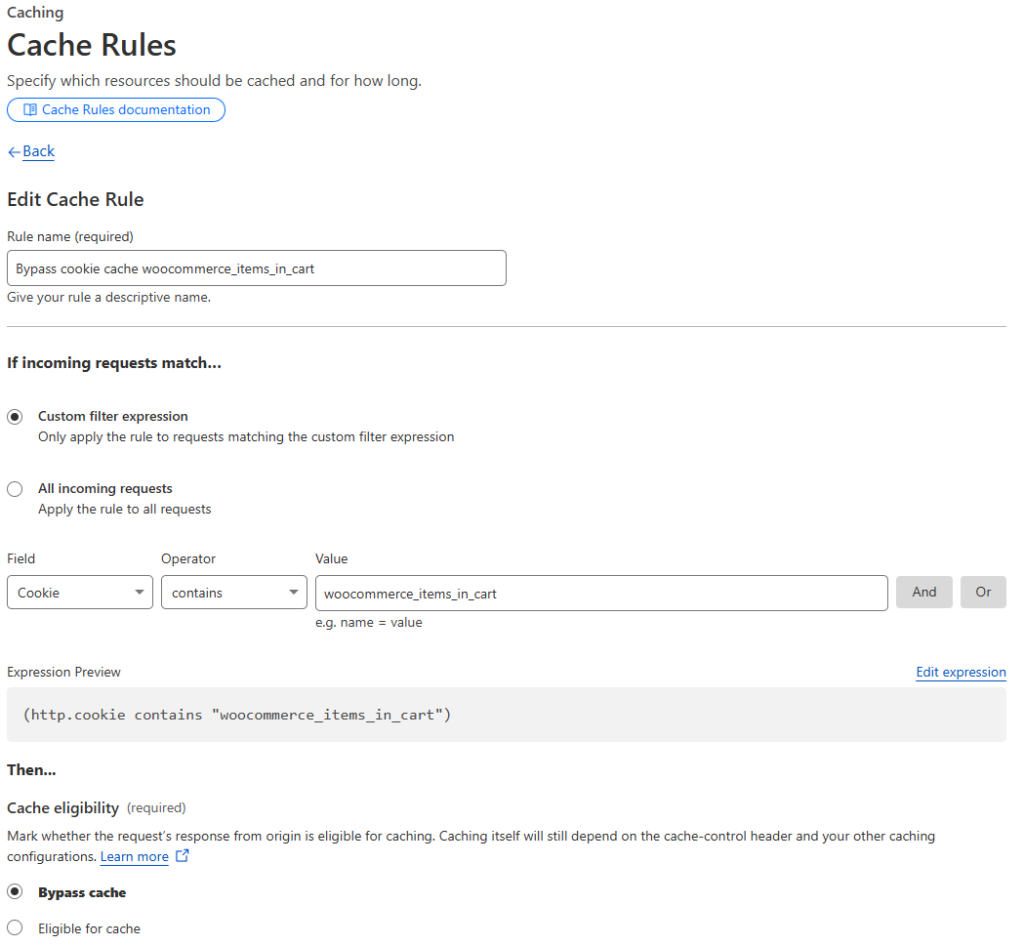
and finally the last one

The Results?
After this setup:
- TTFB drops like a rock
- GTmetrix gives me all A’s
- Woocommerce feels snappy with both logged in and logged out users.
Wrapping It Up
Performance is an art and a science. With the right setup, WooCommerce doesn’t have to be slow — it can be slick, snappy, and just as fun to use as it is to build.
Got questions? Want help setting this up for your own site? Drop a comment or shoot me a message — I’m always happy to geek out.